Contact Details
View complete information about a contact including their conversations, deals, and activity history.
How to get there: Go to Contacts in the top menu → click on any contact.
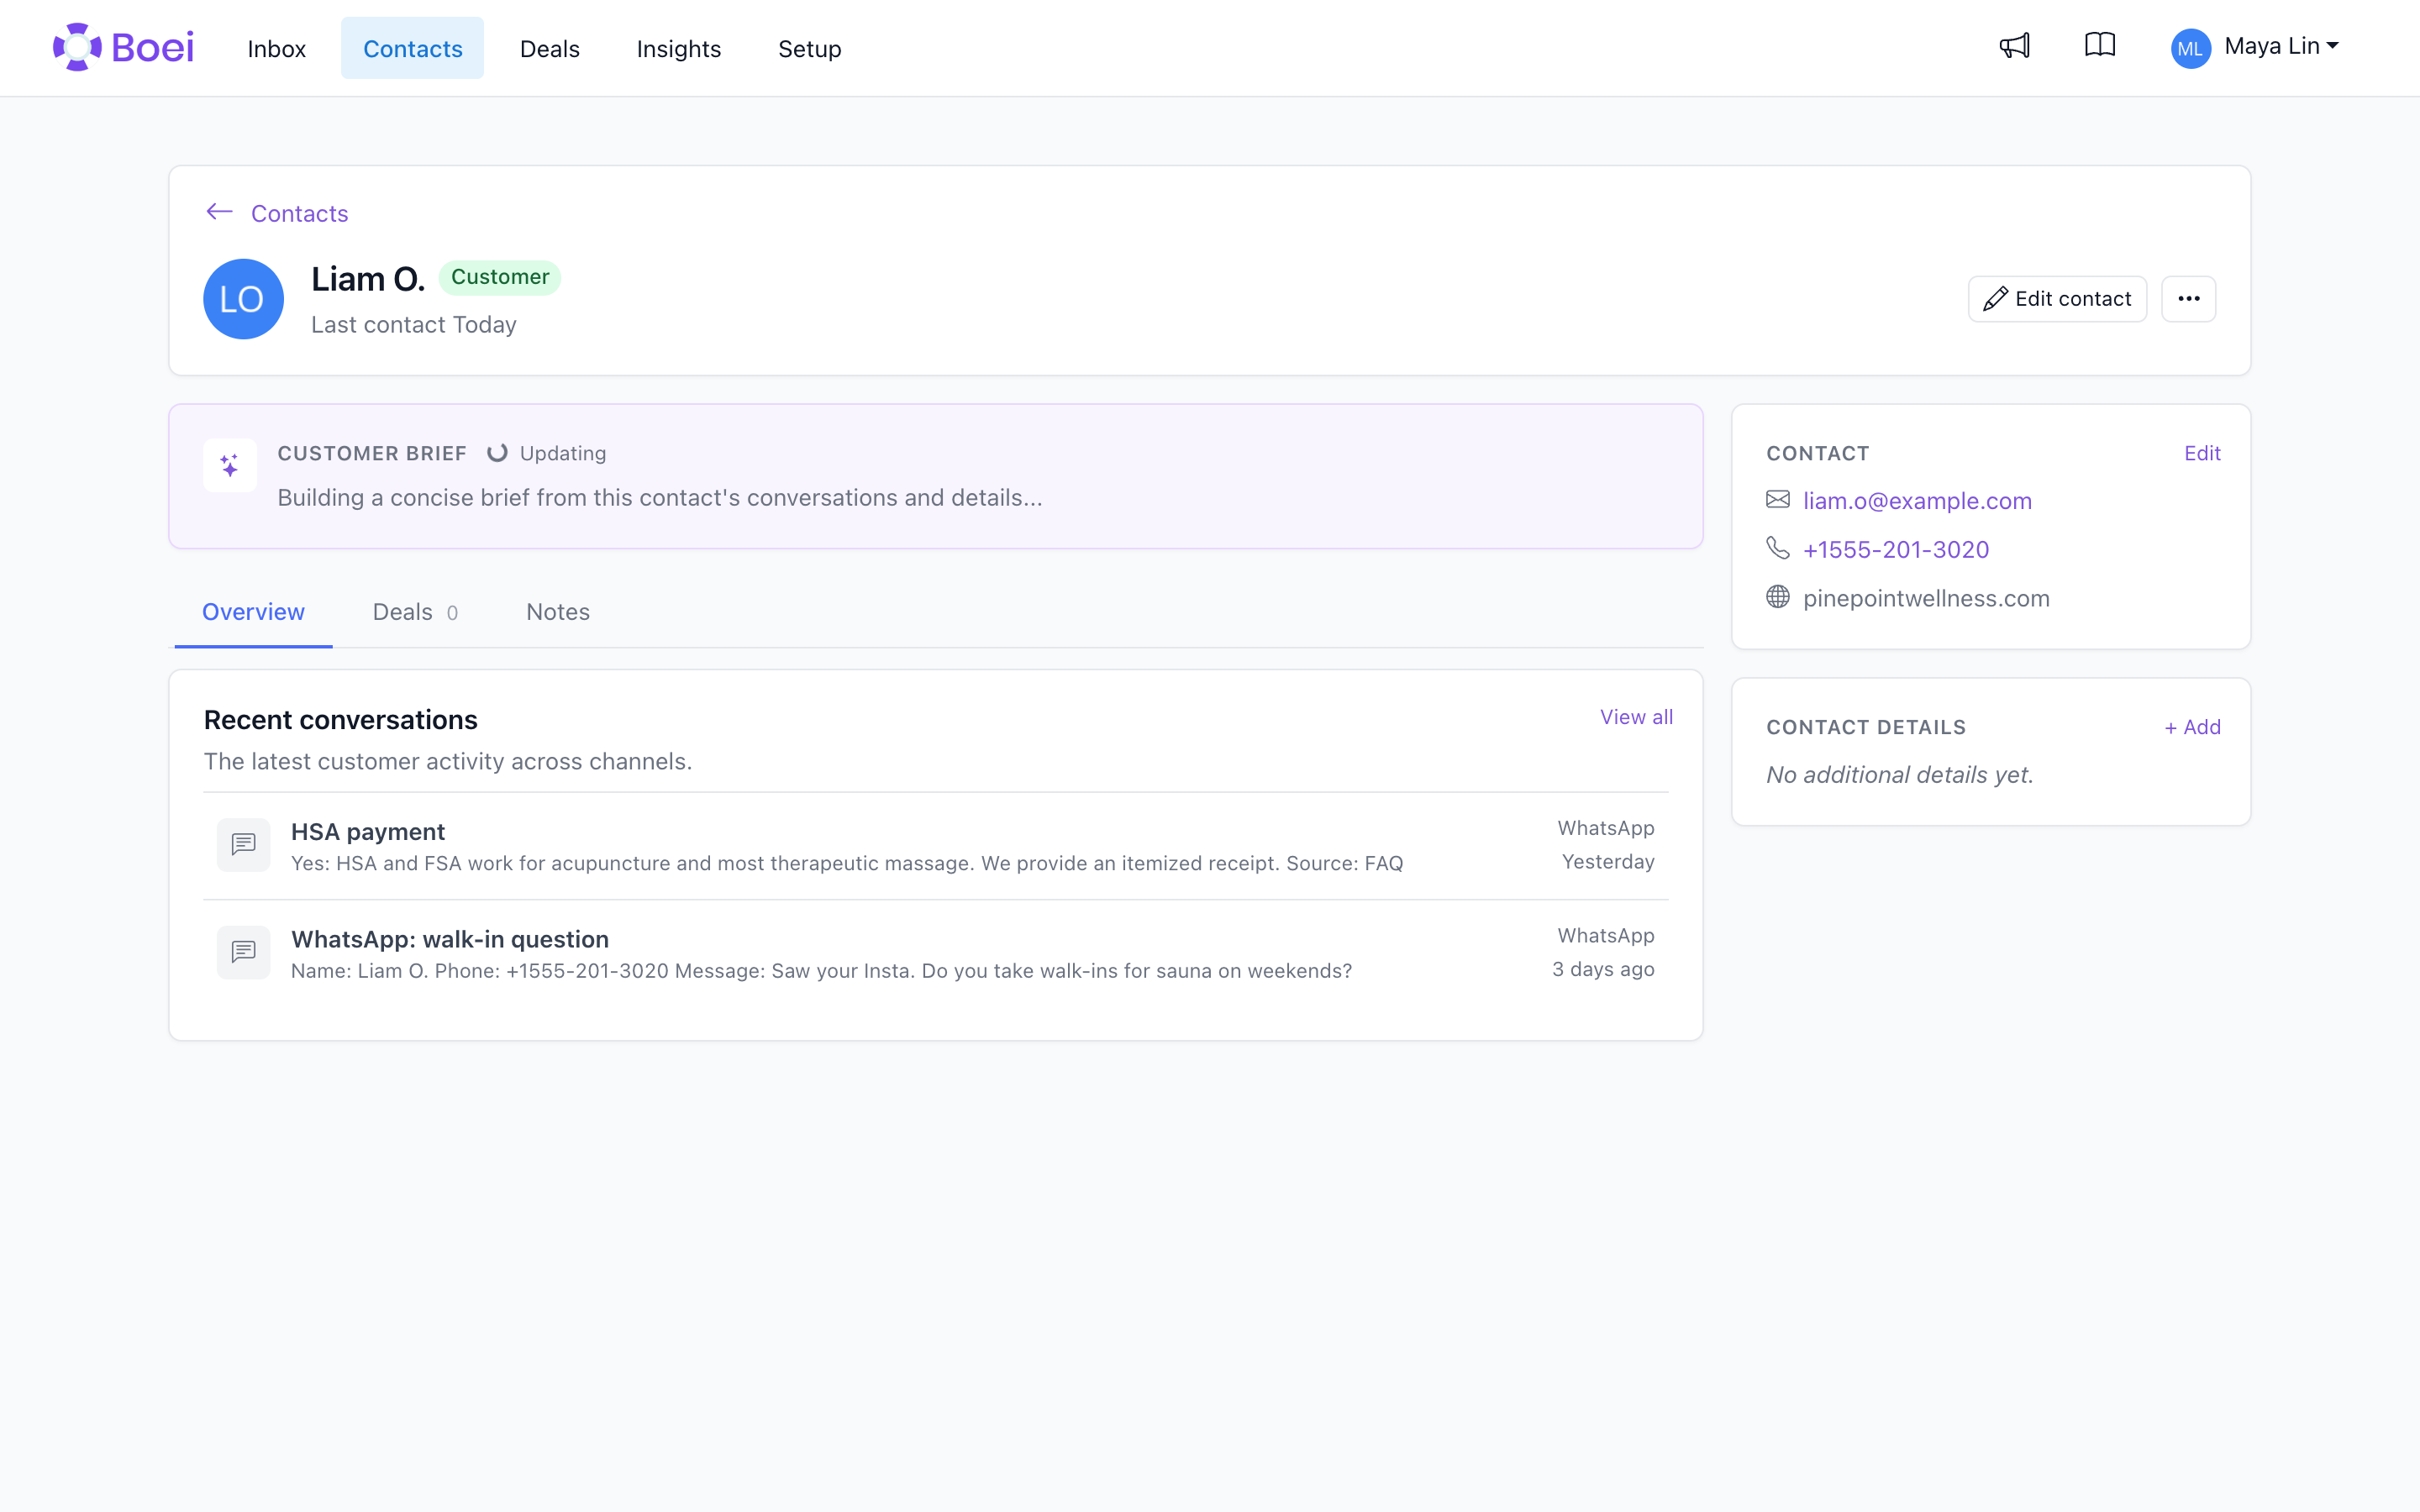
Accessing Contact Details
- Go to Contacts
- Click on any contact in the list
- The contact detail page opens
Contact Header
At the top you'll see:
- Avatar - Contact's profile image (or initials)
- Name - Full name
- Status badge - Lead, Customer, Contact, or Inactive
- Company - Company name (if provided)
- Last contact - When the latest interaction took place
Use Edit contact to update the main identity fields. Less common actions, including merging, creating a deal, and erasing contact data, are in the adjacent menu. Email and phone are shown once in the Contact card.
Customer Brief
Boei shows a short summary of the relationship and, when the available information supports it, a next best action. The action always links back to the conversation it came from.
Boei creates the brief when you open the contact. It reuses the saved brief while the contact details and conversation insights remain unchanged. If new relevant information arrives, the next visit refreshes the brief. This avoids a new AI request on every page load or incoming message.
Inbox Messages
See all conversations with this contact:
- Preview of recent messages
- A short summary and date for each conversation
- Click a conversation to open it in the Inbox
- Click View all to open the Inbox
Deals
View all deals associated with this contact:
- Deal name and status
- Deal value
- Follow-up dates
- Assigned team member
Create Deal from Contact
- Open the menu next to Open inbox, or open the Deals tab
- Click Create Deal
- Fill in deal details (name, value, notes)
- The deal is automatically linked to this contact
Edit or View Deal
Click any deal to open the deal editor and update details.
Notes
Store a note about the contact:
- Add context that should remain useful across conversations
- Record preferences or requirements
- Use a conversation note in the Inbox for information that belongs only to one thread
The page labels this explicitly as a Contact note so it is not confused with a note on the current conversation.
Follow-up Reminders
See and manage scheduled follow-ups:
- Next Action - Shows upcoming reminder
- Overdue - Highlighted if past due date
- Set new reminders from the contact page
Automatically Captured Context
When a conversation ends, the AI reviews what the customer stated and records useful facts with two different lifetimes:
- Contact facts remain useful across future conversations, such as city, job title, industry, preferred language, team size, or a usual riding discipline. These appear as extra fields on the contact.
- Conversation facts belong to one request, such as a vacancy, order number, current issue, desired horse breed, budget, or appointment date. These remain attached to that conversation and appear under Relevant Context when you view the contact.
Hover a fact under Relevant Context and use the pencil button to correct it. Its source conversation remains linked below the value, so you can still inspect the original context.
Only facts supported by an exact customer quote are saved. Facts taken only from an agent or chatbot reply are rejected. A fact is stored on the contact only when it is explicitly classified as durable. If the scope is missing, unknown, or uncertain, Boei keeps it on the conversation.
Boei starts with standard keys and learns additional vocabulary for each account. For example, once your account uses desired_horse_breed, later conversations prefer that same key instead of creating variants. One conversation can introduce at most three new keys, and one account can learn at most 100. Learned vocabulary is isolated per account.
This is separate from the fields you configure in Lead Flows. Lead flows control what gets asked and required inside the conversation. Automatic capture preserves useful information the customer volunteered.
HubSpot Sync Status
If HubSpot integration is enabled:
- Synced badge - Contact exists in HubSpot
- Sync happens automatically when contacts are created/updated
Edit Contact
- Click Edit contact in the page header, or Edit in the Contact card
- Update any field (name, email, phone, company, status, notes)
- Click Save
Delete Contact
- Click Delete on the contact page
- Confirm the deletion
- Contact is permanently removed
Note: Erasing a contact also removes its conversations, messages, deals, and custom fields. This cannot be undone.
Related
- Contacts Overview - Contact list and search
- Export Contacts - Export to Excel
- Deals - Manage your pipeline
- Inbox - View all messages